Table of Contents
MegaSquirt Harness Connector Shell TSB
Date Issued: 10/23/09
Defective Part: Premium MegaSquirt Harnesses
Manufactured From: 4/22/09 to 10/22/09
Summary
This technical service bulletin (TSB) pertains to SymTech Labs Premium MegaSquirt Harnesses, sold both independently and with MegaSquirt ECU's and kits. Due to a flaw in the connector shells, wires in the harness are prone to having their insulation deteriorate creating electrical shorts.
Indications
Premium MegaSquirt Harnesses affected by the faulty connector shells will have one or more electrical shorts. Most commonly, the wire's conductor will contact the metallized shell which is connected to electrical ground.
- When the affected wire is an input, a loss of signal will be observed (i.e. an intermittent or permanent absence of CLT, IAT, TPS, TACH, or O2 signals).
- When the affected wire is an output, the actuator will fail to respond. For instance, fuel injectors and ignition coils may be constantly energized.
- When the affected wire is either the TPS voltage reference wire or the main +12V wire, the MegaSquirt ECU may fail to power on altogether.
If you observe any of these symptoms, first check your firmware and settings. Once the firmware and settings are confirmed to be non-problematic, proceed to the next section. Please note that all SymTech Labs Premium MegaSquirt Harnesses sold after 10/22/09 do not require the procedures outlined in this TSB.
Repair Options
SymTech Labs will arrange for shipping, and repair or replace your harness free of charge through 12/23/09. Please contact support@symtechlabs.com for more details.
Conversely, you may complete the recommended service procedure below to ensure your Premium MegaSquirt Harness continues to function as expected.
Identify Your Connector Shell
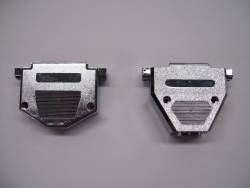
This TSB only pertains to a specific type of connector shell. These shells were included with Premium MegaSquirt Harnesses between approximately 4/22/09 and 10/22/09. Compare your harness to the image below. The problematic newer shell is depicted on the left. If your harness shell resembles the shell depicted on the right, disregard this TSB.
Service Procedure
Shell
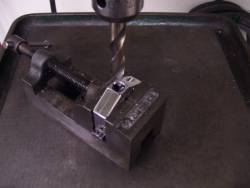
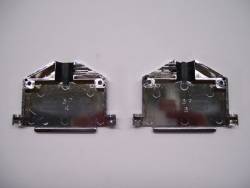
Remove the screws holding the two sections of the connector shell together, taking care not to misplace these or the jack-screws. Remove the shell from the harness. Secure both sections of the shell in a heavy vise or clamp. Using a drill with a 1/2” (12.7 mm) bit, bore the wire orifice.
Boring the wire orifice accomplishes two things. Most importantly, it reduces compression of the harness wires and removes sharp edges to prevent damage to the wires' insulation. Secondly, it removes the metallization on the inner surface of the orifice rendering it non-conductive.
Harness
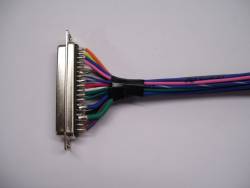
Repair any damaged wires within the harness. If the wire is not frayed and only the insulator is damaged, you may repair the wire using dielectric/“electrical” tape or heat shrink tubing. If the wire is frayed, desolder it from the connector pin, remove the damaged portion and re-solder to the connector.
SymTech Labs recommends insulating the junction at which the wires pass through the connector shell using a rubber grommet. The junction may also be insulated using dielectric/“electrical” tape. This insulation prevents the wires from chaffing against the connector shell.


